


Top 7 Dried Wedding Flower Arrangements 2026
Unlock actionable ideas for Top 7 Dried Wedding Flower Arrangements 2026 so you can make smarter decisions backed by The Flower Boutique.

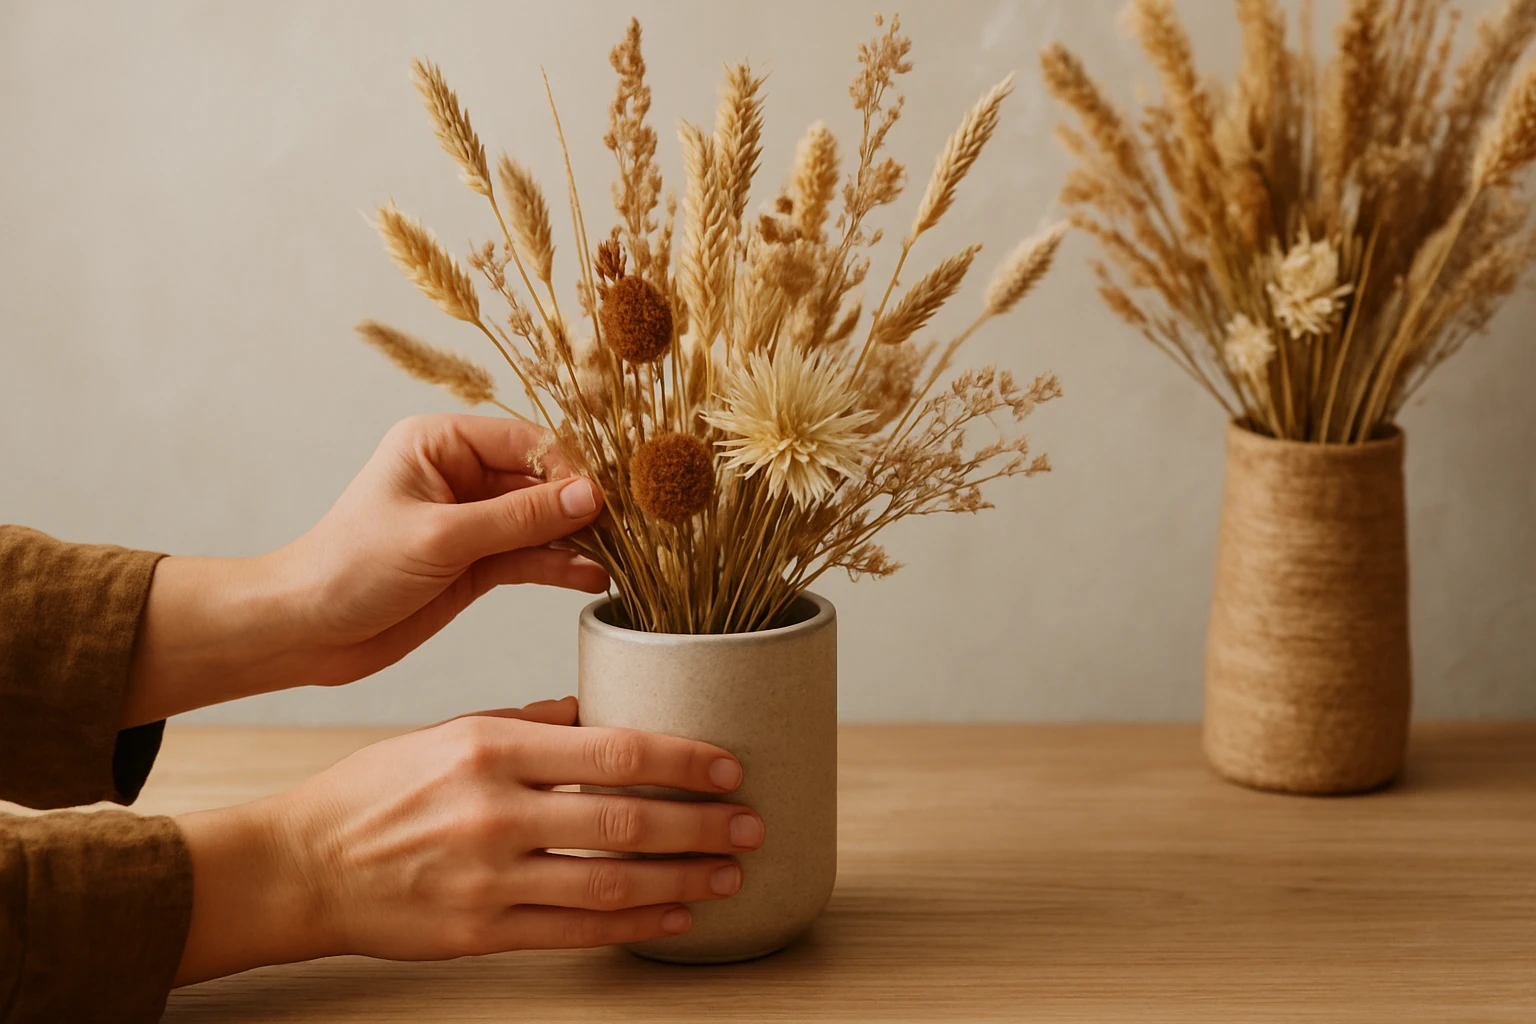
On a Perth worktable, pale stems, ribbon spools, a ceramic vase, and a pair of snips sit beside a half-finished arrangement waiting for a wedding, memorial, or gift delivery. The linen is already dusted with a little oat-colored fluff. A door opens. Someone asks, “Can this feel softer?” and that’s the real job staring back at you.
To help you better understand boho dried flower arrangements, we've included this informative video from Cozy DIY Home. It provides valuable insights and visual demonstrations that complement the written content.
That’s how boho dried flower arrangements usually begin — not with a shopping list, but with a feeling. If you start by grabbing stems because they look pretty on Instagram, you’ll end up with a bunch of nice ingredients and no real story. If you start with mood, you build something that actually belongs in the room.
Boho is relaxed, yes, but relaxed does not mean random. You want ease, movement, softness, and a bit of wildness around the edges. Think cream bunny tails, soft beige palm fans, a trailing bit of preserved eucalyptus, and maybe one sculptural stem that feels a little unexpected. Not stiff. Not symmetrical. Not trying too hard.
I’ve found that the best pieces feel almost inevitable, like they grew that way on purpose. For a Swan Valley wedding, that might mean warm neutrals and a loose silhouette. For a quiet farewell in Subiaco, it might mean restraint, clean spacing, and fewer focal blooms.
Boho dried flowers work best when they feel intentional and personal, not overly packed or overly perfect.
Perth changes everything. A beachfront setup in Cottesloe needs a sturdier shape than a gift arrangement headed to an apartment in East Perth. Dry heat matters. Car transport matters. So does scale. A low arrangement that looks perfect on your bench can disappear on a long reception table or feel too casual in a chapel.
Ask yourself a few blunt questions. Is this piece being carried, parked, handed over, or left in one place? Will it sit under harsh afternoon sun? Does it need to read from two metres away, or only from across a coffee table? Those answers shape the whole design before you place a single stem.
Dried flowers shine when you want memory built into the design. Flower Moxie describes dried flowers as having sentimental value and notes they can be repurposed as home decor or kept as a memento after the event. That tracks with real life. People keep them on shelves, on bedside tables, or in a hallway vase months after the day itself is over.
It’s also telling that the top search results lean heavily toward wedding bouquet collections and product pages rather than practical guidance. You can see that in Flower Moxie and Dried Flowers Forever. People clearly want dried work for weddings and events, but the styling decisions still need a human hand. That’s where you come in.
Prep is boring right up until it saves you 20 minutes and a whole lot of muttering. With dried work, setup matters even more because stems shed a little, lengths vary wildly, and once you’ve jammed everything into the vessel, pulling it back out can turn tidy into chaos.
Flower Moxie lists one dried boho bouquet at roughly 25-50 stems and 24-30 inches long. That tells you two things straight away: dried arrangements often involve more pieces than you think, and stem length can get unruly fast. Get your tools laid out before you start.
| Tool | Why You Need It | Practical Note |
|---|---|---|
| Sharp floral snips | For trimming tough dried stems cleanly | Keep a second pair nearby for thicker woody pieces |
| Vase, compote, or vessel | Sets the scale and the visual mood | Heavy ceramic works well for larger Perth event pieces |
| Floral tape or wire grid | Helps hold stem placement without foam | Great for low bowls and gift-ready designs |
| Chicken wire or pin support | Adds structure for foam-free arranging | Useful when you need stability during transport |
| Twine or ribbon | Finishes hand-tied bundles or wraps stems | Natural fibres suit the boho look better than shiny satin |
| Paper, tray, or drop cloth | Catches shedding and keeps cleanup sane | Brown kraft paper is simple and easy to replace |
Don’t skip this. Strip off anything broken, dusty, or crushed. If you’ve bought mixed bunches, separate the straighter stems from the crooked ones and gently tap loose debris off outdoors if you can. Flower Moxie notes that dried flowers are durable, but light shedding is to be expected. That’s normal, not a disaster.
For delicate pieces like bunny tails or preserved fern, use a lighter touch than you would with fresh roses. I usually line up all my stems on a bench by type first, then trim only when I know where they’re going. Early over-trimming is one of the fastest ways to waste your best material.
Work on a flat, protected surface with enough room to step back. You need space in front, not just side-to-side. Foam-free mechanics are worth using here too. Flower Moxie’s dried wedding content highlights eco-friendly and foam-free alternatives, and for boho work, they often look better because the arrangement breathes more naturally.
Plan for light shedding from the start; work over paper or a tray so cleanup stays simple.
If you’re styling for a venue, mock the final footprint. A 30-centimetre-wide workspace for a 60-centimetre arrangement is asking for trouble. Give yourself breathing room. The flowers will thank you.
Before color, decide emotion. Wedding softness feels different from memorial restraint. Celebration warmth is not the same as gift-ready intimacy. If the event is romantic, airy, and candlelit, you’ll want movement and softness. If it’s a remembrance piece, you may want calm, steadier shapes and fewer dramatic contrasts.
Try writing down three words. For example: “quiet, warm, grounded” for a condolence arrangement, or “light, creamy, windswept” for a boho ceremony bouquet. It sounds simple because it is. Simple works.
One top result features a cream-and-beige dried bouquet designed for a boho or fall wedding, and honestly, that tells you a lot about where this style lives best. Neutrals do the heavy lifting. Start with cream, ivory, beige, oat, sand, latte, and soft brown. Those tones give you room to play with texture without making the arrangement noisy.
| Occasion | Best Base Tones | Accent Direction |
|---|---|---|
| Wedding | Cream, beige, ivory | Dusty blush, muted apricot |
| Memorial | Oat, sand, warm white | Very soft sage or none at all |
| Celebration | Biscuit, tan, soft caramel | Terracotta, faded mustard |
| Gift | Ivory, oatmeal, latte | Mauve, rust, or one personal tone |
Dried Flowers Forever’s collection sorts bouquets by ivory white, pink, burgundy, orange, yellow, blue, green, and purple. That broad but curated range is useful. It shows you can work with color, but you still need discipline. Don’t throw in mauve, rust, mustard, and burgundy just because they’re all trendy.
For boho styling, neutrals usually do the heavy lifting; color should feel like an accent, not the main event.
If you’re unsure, add one accent family only. One. A little dusty rose alongside cream and sand can look poetic. Three competing shades can look like the arrangement lost an argument.
Your vessel decides a lot before the stems do. A tall ceramic vase gives you lift and drama. A low compote creates a broad, table-friendly profile. A narrow-neck vase forces a tighter, more vertical shape. None of these is automatically “more boho.” They just tell different stories.
For gifts, I like a vessel with a little weight so it doesn’t wobble in transit. For reception tables, low shapes usually work better because guests can still see each other across the arrangement. Practical, yes. But also prettier when the scale suits the setting.
Foam-free support is often the better call for dried work. Flower Moxie specifically promotes eco-friendly and foam-free alternatives, and that lines up with what many florists now prefer for dried arrangements. Chicken wire, a taped grid, or a pin-style support lets you angle stems more naturally than a dense foam block.
Traditional mechanics can still help in some event setups, especially if you need speed or a very fixed shape, but they can also make boho work look stiff. If you want that relaxed, airy feeling, give your stems room to move.
Dried Flowers Forever separates dried wedding bouquets from dried wedding decor, and that distinction matters. A hand-tied bouquet needs secure binding and a clean handle. A ceremony meadow piece needs weight and stability. A sympathy arrangement for a service may need a clear front-facing view more than a perfect 360-degree profile.
If the arrangement will be moved between venue, ceremony, and reception, choose the simplest support that still keeps the shape steady.
I learned this the hard way on a Perth wedding day when a complicated internal support shifted in the car and threw the whole silhouette off. Simple wins more often than clever.
Before placing anything, sort your stems into long, medium, and short groups. Flower Moxie’s example bouquet sits around 24-30 inches long, which is a strong reminder that dried stems arrive with real range. If you skip sorting, you’ll keep stopping mid-design to wrestle with lengths, and the arrangement will lose momentum.
I usually make three piles on the bench: tallest lines at the back, body stems in the middle, and finishing pieces up front. It looks fussy for five minutes, then it makes the whole build faster.
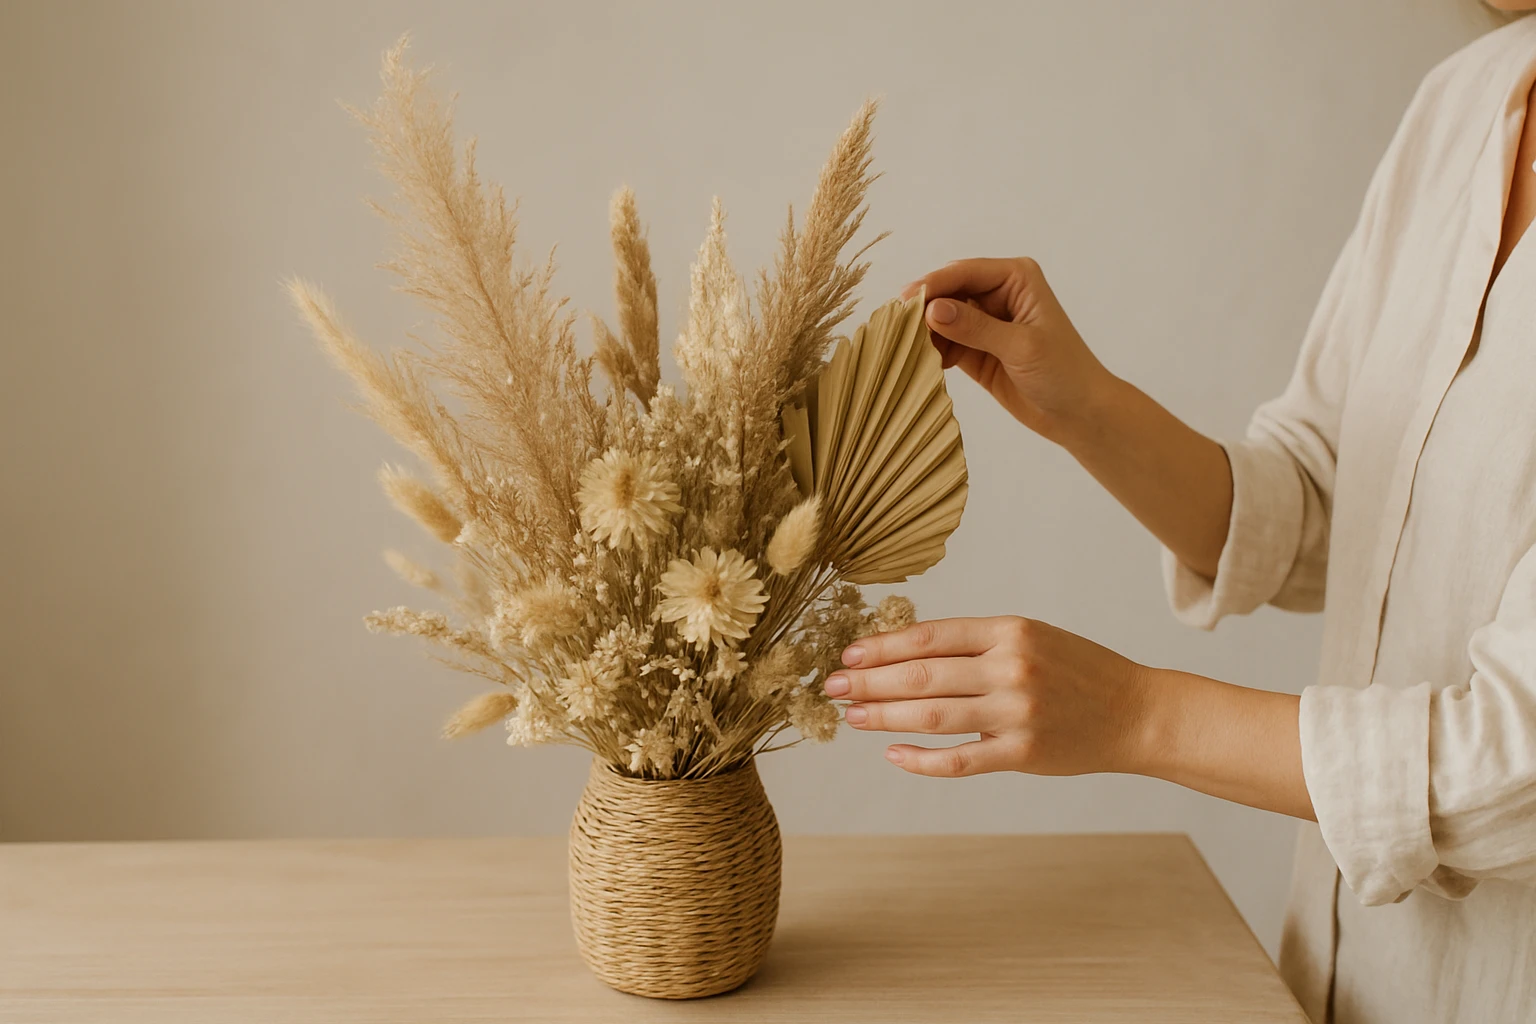
Texture is where boho styling comes alive. Separate the fluffy stuff from the line work and the fillers. Bunny tails, pampas-style grasses, or soft oats give you cloudiness. Palm spears, ruscus, or sturdy branches give you shape. Small fillers like statice-like textures or seed heads soften transitions between the bigger moves.
If you’re working with 25-50 stems, don’t spend your prettiest pieces too early. Hold back the most sculptural fan, the cleanest preserved bloom, or the most beautiful arc until the base is built. Those are your anchors, not your gap-fillers.
Don’t start placing stems until you know which pieces are your anchors and which are your fillers.
This is where restraint pays off. The best focal stem should feel chosen, not rescued from the leftovers pile.
Start with your longest and most structural stems. Place them first to establish height, width, and movement. Think in outline, not detail. Do you want a loose crescent? A windswept diagonal? A soft cloud with one side lifted? Sketch that shape in space before you worry about pretty bits.
Dried flowers are fairly forgiving here. Flower Moxie describes them as durable, and that helps when you need to build, pull back, and rebuild the outline. Still, handle them gently. Durable doesn’t mean indestructible.
Now place your hero stems — slightly off-center, not dead middle. That off-center move is where a lot of boho magic lives. If you split everything evenly left and right, the arrangement gets formal fast. Formal has its place. This usually isn’t it.
For example, in a neutral gift arrangement, you might tuck one larger preserved bloom a little left of centre, then echo it with smaller textures on the opposite side. Your eye travels. The piece feels alive.
Once the skeleton and focal points are in, soften the edges. Thread in the fluffier stems where the shape feels too abrupt. Let some pieces float out farther than you think you should. This matters because dried arrangements often get repurposed after the event as home decor or keepsakes, so a flexible, natural layout is worth building from the start.
A boho arrangement usually looks better a little asymmetric than perfectly round.
I still have one from a 2024 autumn event in Fremantle on a shelf at home. The shape that lasted best was the one we didn’t over-control.
Now you edit. This is the stage where good arrangements become polished ones. Trim the stem that shoots out too harshly. Remove the filler that crowds a focal bloom. Shorten anything that makes the vessel feel top-heavy. Because dried flowers shed lightly, make these finishing touches with a calm hand rather than rapid-fire snipping.
When I’m unsure, I take away one stem before I add one. Nine times out of ten, the arrangement needed subtraction, not more stuffing.
Rotate the piece a quarter turn at a time. Don’t trust the first angle you loved. The top search results are dominated by bouquet and arrangement pages for a reason: presentation is central in this category, and dried work has to read well in photos, on tables, and in person.
Stand up. Sit down. Look from eye level. Look from doorway distance. I even use my phone camera from about a metre away because it catches awkward gaps faster than my brain sometimes does.
Even if your piece is mostly all-round, most arrangements still have a hero side. Decide what it is. That’s especially true for memorial tributes, entryway designs, and gift deliveries where the recipient sees the arrangement from one main angle first.
If the arrangement looks good only from one angle, it is not finished yet.
Once the overall balance is right, stop. Really. Overworking is one of the easiest ways to flatten the airy look you just spent time creating.
Transport isn’t a boring admin detail. It’s part of the design. Flower Moxie explicitly warns that light shedding is to be expected with dried flowers, so protect the piece before it leaves your bench. Wrap the arrangement loosely with tissue if needed, keep the vessel upright in a snug box, and wedge the base so it can’t slide.
I once watched a beautiful neutral piece flatten itself in the back of a hatchback on Canning Highway because it had room to tip. It only takes one sharp turn. Build the travel plan into the styling brief from the beginning.
Place dried arrangements away from rough traffic, swinging doors, and spots where guests will brush past them. For weddings, think aisle edges, signing tables, bars, or welcome plinths that won’t get bumped. For homes, sideboards and shelves usually outperform kitchen corners and busy hallways.
Dried flowers are durable enough for keepsake placement after the event, which is one reason they work so well for meaningful gifting. Just make sure the final spot supports the shape you worked so hard to build.
Damp is the enemy. Crushing is a close second. Keep the arrangement away from misty bathrooms, open windows in bad weather, and heavy stacking in storage. If you’re delivering during a Perth winter downpour, cover the piece fully before you move it from car to venue.
For weddings, funerals, and gift deliveries, transport is part of the styling brief, not an afterthought.
A calm arrangement should arrive looking calm. That sounds obvious, but it takes planning to make it true.
This is mistake number one. You keep adding stems because empty space feels scary. Then suddenly the arrangement loses every bit of grace it had. Boho style needs air. Let stems breathe. Let negative space show. The vessel should support the flowers, not disappear under a traffic jam of filler.
Less is usually better: boho should read as airy and intentional, not crowded.
Flower Moxie is clear that light shedding is expected. If you treat dried flowers exactly like fresh flowers, you’ll make a mess and increase damage. Don’t toss them loose in the car. Don’t over-handle delicate textures. Don’t leave them uncovered in a damp loading bay and hope for the best.
If you plan for a bit of natural debris, use a protected workspace, and secure the finished piece properly, the whole process feels easier. Because it is easier.
The collection pages in the search results show plenty of color choice, but they still feel curated. That’s the lesson. You do not need every hue available. A funeral tribute in loud mustard and bright purple might feel jarring. A romantic neutral wedding bouquet with one muddy blue stem jammed in “for interest” can feel off too.
When in doubt, pull back to creams, ivories, beiges, and one accent family that actually supports the mood. If you want a quick gut-check, set three stems together on the table and ask, “Does this feel like the same story?” If not, swap one out.
You’re not just arranging stems. You’re shaping how the moment feels.
Match mood, structure, and texture, and your boho dried flower arrangements will arrive looking calm, meaningful, and finished instead of fussy or fragile.
Start neutral, build with intention, and protect the piece like transport matters — because it does. Which occasion in Perth are you styling for first: a wedding table, a quiet farewell, or a heartfelt gift?
Personalised Flower Boxes help Perth families and event planners send tailored florals for weddings, farewells, celebrations, and gifts, with easy pickup or delivery.
Browse Boxes0 comments

